Understanding Ice and Water Shield for Roofing in Lake Oswego, Oregon
Protecting your home from the elements starts from the top down, and in a region like Lake Oswego, Oregon, where rainfall is frequent and winter can bring freezing temperatures, the integrity of your roof is paramount. While shingles or tiles are the visible first line of defense, the layers beneath play an equally, if not more, critical role in preventing water intrusion. Among these vital components is Ice and Water Shield, a specialized roofing underlayment designed to offer superior protection against the most challenging forms of water damage. Understanding what Ice and Water Shield is, why it's necessary, and where it should be installed is key to ensuring the long-term health and durability of your roofing system and the structure it protects. This comprehensive guide will delve into the specifics of this essential material and its significance for homes in areas prone to harsh weather conditions.
What is Ice and Water Shield?
At its core, Ice and Water Shield is a type of roofing underlayment, but unlike traditional felt or synthetic underlayments, it possesses unique properties that make it exceptionally effective at preventing water penetration. It is a self-adhering, waterproof membrane composed typically of a rubberized asphalt adhesive layer bonded to a strong, flexible polyethylene film.
The "self-adhering" property is crucial. When installed directly onto the roof deck, the adhesive backing creates a tight bond, effectively sealing the deck surface. Furthermore, this rubberized asphalt has a unique characteristic known as "self-sealing." This means that when roofing fasteners, such as nails or staples, penetrate the membrane, the material actually seals around the fastener shaft. This prevents water from seeping through the tiny holes created by the fasteners, which is a common point of failure for standard underlayments, especially in areas prone to water accumulation or backup.
Think of it as an extra layer of insurance for the most vulnerable parts of your roof. While shingles shed the majority of water, wind-driven rain and melting ice can force water sideways or even upwards beneath the primary roofing material. Without a robust barrier like Ice and Water Shield, this water can reach the roof deck, leading to rot, mold, structural damage, and leaks inside your home.
Why is Ice and Water Shield Crucial for Roof Protection?
The primary reason Ice and Water Shield is considered essential in many climates and building codes is its ability to defend against two specific, damaging types of water intrusion: ice dams and wind-driven rain.
Protecting Against Ice Dams
Ice dams are a common and potentially devastating problem in regions that experience freezing temperatures and snowfall, which can occur in the Lake Oswego area. They form when heat from inside the house melts snow on the warmer parts of the roof. This meltwater then runs down the roof slope until it reaches a colder section, typically at the eaves (the roof edge), where the roof extends beyond the exterior wall and is not warmed by the house's interior heat. Here, the water refreezes, forming a ridge of ice.
As more snow melts, the water backs up behind this ice ridge, creating a pool of standing water on the roof. Because this water is trapped and cannot drain properly, it sits on the roof surface and can seep under the shingles. Standard roofing felt or synthetic underlayment may not be completely waterproof under hydrostatic pressure (the pressure from standing water) and does not seal around nail penetrations. This allows the backed-up water to penetrate the roof deck, saturating the wood, leading to rot, and eventually leaking into the attic, walls, and ceilings below.
Ice and Water Shield, installed at the eaves, provides a watertight seal directly to the deck. Its self-adhering nature prevents water from getting underneath it, and its self-sealing properties ensure that nail penetrations do not become leak points. This creates a robust barrier that can withstand the pressure of backed-up water from ice dams, preventing it from reaching the roof deck and causing damage.
Defending Against Wind-Driven Rain
Wind-driven rain occurs during storms when strong winds force rain horizontally or even upwards. While roofing materials like shingles are designed to shed water flowing downwards due to gravity, wind can push water under the edges of shingles or through small gaps.
In areas particularly exposed to wind, such as coastal regions or properties on hillsides, wind-driven rain can be a significant source of leaks. Even small amounts of water repeatedly entering the roof deck can lead to rot and mold over time.
Ice and Water Shield, with its continuous, self-adhered, and self-sealing membrane, provides an excellent secondary barrier against wind-driven rain. It prevents water that manages to get past the primary roofing material from reaching the roof deck, directing it instead towards the gutters. This is especially important in areas like eaves, rakes (gable ends), and around roof penetrations where wind can easily force water underneath the shingles.
Beyond these two major threats, Ice and Water Shield also offers general protection against leaks that might occur due to damaged shingles, clogged gutters causing water backup, or other unforeseen issues. It acts as a reliable backup layer, ensuring that minor breaches in the primary roofing material don't immediately translate into interior water damage.
Where is Ice and Water Shield Typically Used?
While standard underlayment is installed across the entire roof deck, Ice and Water Shield is strategically placed in areas known to be most vulnerable to water penetration and ice damming. Building codes often mandate its use in specific locations, particularly in regions with colder climates or those prone to high winds and heavy rain. Common areas for installation include:
Eaves
The eaves are the edges of the roof that overhang the walls. This is the most critical location for Ice and Water Shield because it's where ice dams form. The membrane is typically installed along the entire length of the eaves, extending from the edge of the roof upwards the slope. Building codes usually specify a minimum distance the membrane must extend past the interior wall line (often 24 inches), ensuring protection even if the ice dam extends slightly inwards from the overhang. This area is also vulnerable to wind-driven rain being forced under the shingles.
Valleys
Roof valleys are formed where two sloping roof sections meet. They channel large volumes of water and snowmelt from both roof sections, making them highly susceptible to leaks. Water flows faster and accumulates more heavily in valleys, increasing the risk of penetration, especially during heavy rain or when debris causes blockages. Ice and Water Shield is installed along the entire length of roof valleys, providing a watertight seal that can handle the increased water flow and potential for standing water or ice accumulation.
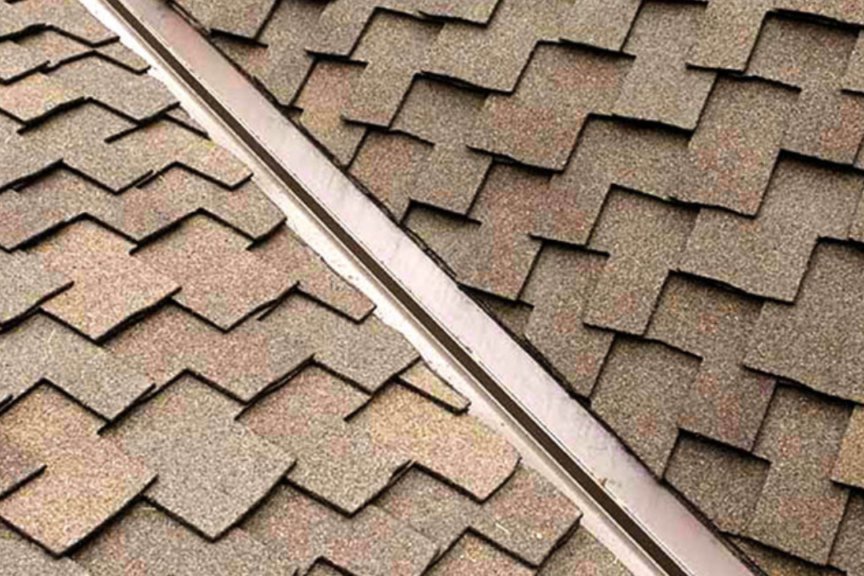
An example of a roof valley, a critical area for Ice and Water Shield installation.
Around Chimneys and Skylights
Any object penetrating the roof deck creates a break in the continuous surface and requires specialized flashing to prevent leaks. Chimneys, skylights, plumbing vents, and other penetrations are notorious weak points if not sealed correctly. Ice and Water Shield is often used in conjunction with traditional flashing methods around these elements. It is applied to the roof deck surrounding the penetration before the flashing is installed, providing an extra layer of defense. The self-adhering and self-sealing properties are particularly beneficial here, as they help seal around fasteners used for flashing or the penetration itself.
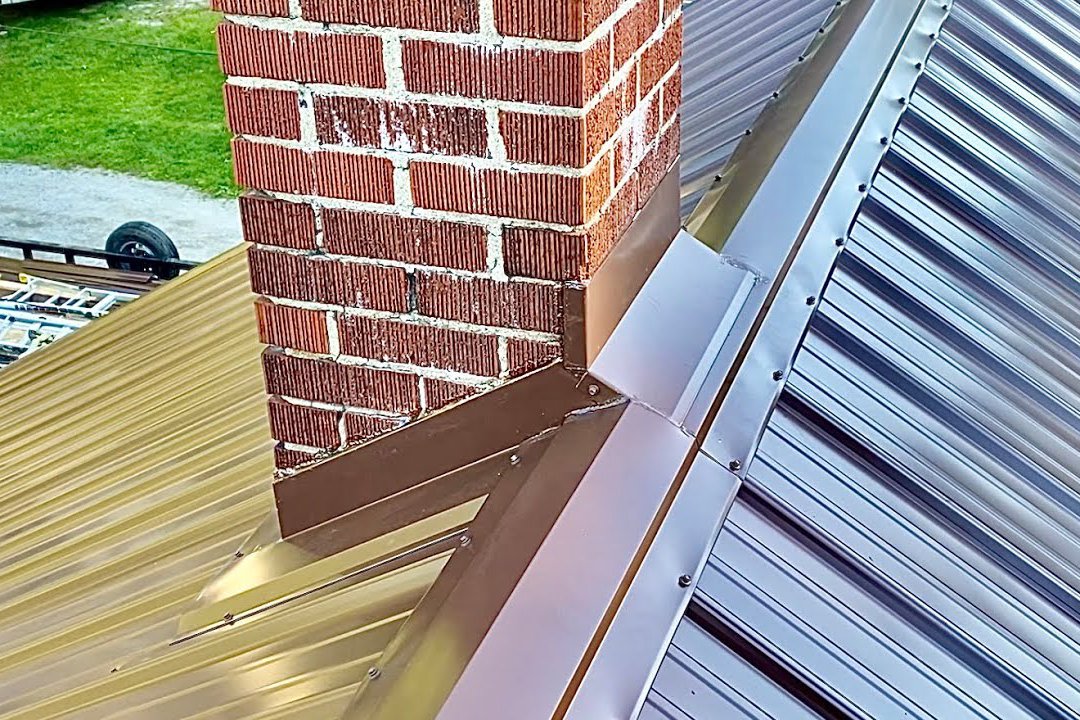
Flashing around a chimney, where Ice and Water Shield is often applied underneath for extra protection.
Low-Slope Areas
Roofs with very low slopes (minimal pitch) are more susceptible to water pooling rather than draining quickly. While flat roofs use different systems, asphalt shingle roofs with low slopes (typically below 4:12 pitch, though minimum pitch requirements vary) may benefit from wider coverage of Ice and Water Shield because water drains slower and is more likely to back up or be affected by wind. Some codes may require full coverage on very low-slope sections if shingles are used.
Rakes (Gable Ends)
While not as critical as eaves or valleys for ice damming, rake edges can be vulnerable to wind-driven rain being forced under the shingles, especially in high-wind areas. Applying a strip of Ice and Water Shield along the rake edges can provide added protection against this type of water intrusion.
The Complete Roof System: More Than Just Shingles
It's vital to understand that Ice and Water Shield is just one component of a complete, properly functioning roofing system. For your roof to effectively protect your home, all layers must work together. A typical sloped roof system includes:
- Roof Deck: The structural surface, usually plywood or OSB, to which all other roofing materials are attached. It must be sound and dry before installation begins.
- Ice and Water Shield: Applied to vulnerable areas as discussed above.
- Underlayment: Felt or synthetic material applied over the rest of the roof deck not covered by Ice and Water Shield. It provides a secondary barrier against water and protects the deck during installation. While not self-sealing around fasteners like Ice and Water Shield, it adds a layer of protection and helps the primary roofing material lay flat.
- Flashing: Metal or other material used to seal joints and transitions on the roof, such as around chimneys, vents, skylights, and in valleys. Flashing directs water away from these vulnerable areas.
- Starter Shingles: The first row of shingles installed along the eaves and rakes, designed to provide a clean edge and proper seal for the first course of main shingles.
- Primary Roofing Material: Shingles (asphalt, wood, slate, tile), metal panels, etc. This is the main weather barrier, shedding the vast majority of water.
- Ridge Cap and Hip Shingles: Shingles specifically designed to cover the peaks (ridges) and angled intersections (hips) of the roof, providing a watertight seal for these areas.
- Ventilation: A properly balanced system of intake vents (typically in the soffits) and exhaust vents (at or near the ridge) is crucial for allowing air to flow through the attic. Good ventilation helps regulate attic temperature, reducing heat buildup in summer and, importantly for Ice and Water Shield, minimizing temperature differences that contribute to ice dam formation in winter. It also helps remove moisture from the attic, preventing mold and rot.
Each of these components plays a role. Even the best Ice and Water Shield installation won't compensate for inadequate flashing or poor ventilation. A professional roofing contractor understands how these layers interact and ensures each is installed correctly according to manufacturer specifications and local building codes.
Installation Process and Considerations
Proper installation is paramount for Ice and Water Shield to perform effectively. While the concept of peeling and sticking seems simple, the details matter significantly.
- Surface Preparation: The roof deck must be clean, dry, and free of debris, old roofing materials, or fasteners. Any damaged sheathing must be replaced. The surface should be smooth and free of voids.
- Cutting and Measuring: The membrane is cut to the required lengths for eaves, valleys, or around penetrations. Accurate measuring ensures proper coverage and overlap.
- Peeling and Sticking: The release liner is peeled back gradually as the membrane is rolled or pressed onto the roof deck. Care must be taken to ensure it lies flat without wrinkles or bubbles, which can trap water or prevent proper adhesion.
- Overlapping: Multiple pieces of Ice and Water Shield must be properly overlapped (typically 3-6 inches, depending on the manufacturer) to maintain a continuous watertight seal. The direction of overlap is crucial – upper pieces must overlap lower pieces so water flows over the seam.
- Detailing Around Penetrations: Around chimneys, skylights, and vents, the membrane must be carefully cut and fitted to extend up vertical surfaces and integrate seamlessly with the flashing. This requires skill and attention to detail.
- Temperature: Installation is typically recommended within a specific temperature range. If it's too cold, the adhesive may not bond properly. If it's too hot, the material can become too pliable and difficult to handle.
- Shingle Installation: Once the Ice and Water Shield and any other underlayment are installed, the primary roofing material is applied. The Ice and Water Shield's self-sealing property activates as fasteners pass through it, creating a seal around the nail shaft.
Proper installation of Ice and Water Shield is a critical step in ensuring your roof's long-term performance. It requires attention to detail and adherence to manufacturer guidelines. For a professional assessment or installation, consider booking an appointment with a qualified local roofer.
Schedule a Professional Roofing Inspection or Service
Code Requirements and Climate Relevance
Building codes in many parts of North America, particularly in regions experiencing freezing temperatures and snowfall, mandate the use of Ice and Water Shield or an equivalent product along the eaves to protect against ice dams. The specific requirements regarding the width of coverage (how far up the roof slope it must extend) vary depending on the climate zone and local amendments to the code. Some codes may also require its use in valleys or other vulnerable areas.
In the Lake Oswego area, which experiences cold winters and significant rainfall, the potential for ice dams exists, and wind-driven rain is a common occurrence. Therefore, Ice and Water Shield is a highly relevant and often required component of a robust roofing system designed to withstand the local climate challenges. Even if not strictly mandated by code for every single application, installing it in key areas is considered a best practice by experienced roofing professionals for enhanced protection and peace of mind.
Understanding the specific code requirements for your area is important when planning a roof replacement or repair. A qualified local roofing contractor will be knowledgeable about these requirements and can ensure your new roof meets or exceeds them, providing optimal protection.
Identifying Roof Issues Related to Water Intrusion
Sometimes, homeowners only start thinking about underlying roof components like Ice and Water Shield when they notice signs of a problem. Water damage inside your home is a clear indicator that the roofing system's primary defenses have been breached. Signs to look out for include:
- Water stains on ceilings or walls.
- Peeling paint or bubbling drywall, particularly on exterior walls near the ceiling or around windows.
- Damp or moldy smells in the attic or upper levels.
- Visible water dripping from the ceiling or light fixtures.
- Sagging sections of ceiling or walls.
- Exterior signs of potential issues, such as missing or damaged shingles, damaged flashing, or visible ice dams in winter.
If you observe any of these signs, it's crucial to act quickly. Water intrusion can cause significant damage to your home's structure, insulation, and interior finishes. While some issues might be simple flashing problems, others could indicate that the underlying protective layers, including the Ice and Water Shield or standard underlayment, have failed or were improperly installed.
Addressing active leaks or suspected water damage requires a professional assessment. An experienced roofer can inspect your roof, attic, and interior to pinpoint the source of the leak and recommend the necessary repairs.
Experiencing a roof leak or seeing signs of water damage? Don't wait. Immediate professional inspection is key to preventing further damage.
Book a Professional Roofer Appointment Today
Planning for a Roof Project: Estimates and Evaluation
Whether you're dealing with an immediate issue or planning a future roof replacement, understanding the costs and scope of the project is essential. A new roof is a significant investment, and ensuring it includes crucial protective elements like Ice and Water Shield is vital for its longevity and performance.
For planned projects, such as replacing an aging roof before leaks occur, getting an accurate estimate is a crucial first step in budgeting and decision-making. Knowing the potential costs allows you to plan financially and explore different material options.
Evaluating the current condition of your roof, even if there are no active leaks, can help you anticipate future needs and budget accordingly. Understanding the expected lifespan of your current materials and identifying any early signs of wear can inform your planning timeline.
Considering a roof replacement or need to budget for future roofing projects? Get a quick, accurate estimate to start your planning.
Get Your Free Instant Roof Estimate
An instant estimate can provide a baseline cost based on the size and complexity of your roof, allowing you to compare against potential bids from contractors. When discussing the project with roofers, be sure to ask about the type of underlayment and Ice and Water Shield they use and where they plan to install it, ensuring it meets or exceeds best practices for your climate.
Benefits of Proper Ice and Water Shield Installation
Investing in quality Ice and Water Shield and ensuring its proper installation provides several significant benefits for homeowners:
- Superior Water Protection: Offers a robust secondary barrier against the most challenging water threats: ice dams and wind-driven rain.
- Prevents Structural Damage: By keeping the roof deck dry, it prevents rot, mold, and deterioration of the sheathing and underlying structure.
- Protects Interior Finishes: Prevents leaks that can damage ceilings, walls, insulation, and personal belongings.
- Extends Roof Lifespan: By protecting the roof deck from moisture, it helps the entire roofing system last longer.
- Reduces Risk of Costly Repairs: Preventing water damage is significantly less expensive than repairing it after it occurs.
- Meets or Exceeds Code: Ensures your roof complies with current building regulations, which can be important for insurance and resale.
- Peace of Mind: Knowing your home is protected by a high-performance water barrier offers significant peace of mind, especially during severe weather.
While Ice and Water Shield is more expensive than traditional felt paper, the added protection it provides to critical areas of the roof is invaluable in preventing costly water damage down the line. It is a relatively small investment compared to the overall cost of a roof replacement or the potential expense of repairing interior water damage.
Protecting Your Investment From the Top Down
Your roof is one of the most critical components of your home, serving as the primary shield against the elements. Understanding the role of each layer, from the visible shingles to the essential Ice and Water Shield beneath, empowers you as a homeowner. In a climate like that of Lake Oswego, the threats of ice dams and wind-driven rain are real, making the inclusion and correct installation of Ice and Water Shield not just a recommendation, but a vital necessity for long-term protection. By ensuring your roofing system is built with quality materials and installed by experienced professionals, you safeguard your home, your belongings, and your peace of mind for years to come.