How Many Nails Per Shingle? A Guide for Scappoose, Oregon Homeowners
The roof over your head is your home's primary defense against the elements. While the type and quality of shingles are important, the way they are fastened to the roof deck is absolutely critical to their performance and longevity. One question homeowners often ask, or should ask, is about the specifics of this fastening process. Specifically, how many nails should go into shingles? For homes in areas like Scappoose, Oregon, where weather can vary, getting this detail right is paramount. While it might seem like a minor technicality, using the correct number of nails, placed in the right location, is a fundamental requirement for a secure, durable roof system and for ensuring your shingle manufacturer's warranty remains valid.
Understanding proper shingle nailing is key not just for new installations but also for anyone evaluating the condition of an existing roof or planning future work. It's a detail that separates a roof that will last from one prone to premature failure. This guide will delve into the standard recommendations, the reasons behind them, and what can happen when nailing isn't done correctly.
The Foundation of a Secure Roof: Understanding Shingle Nailing
Asphalt shingles, whether the traditional 3-tab style or the more popular architectural laminate variety, are designed with specific guidelines for installation. These guidelines are developed through rigorous testing by manufacturers to ensure the shingles perform as intended under various weather conditions, including wind, rain, and temperature fluctuations. The nailing pattern and the number of nails used are central to these guidelines.
Each shingle has a designated nailing area, often indicated by a line or a reinforced strip. Nailing within this area ensures that the nail passes through the shingle layers properly and into the roof deck, providing maximum holding power without damaging the shingle itself. The purpose of the nail is to secure the shingle firmly to the deck, preventing it from sliding or, more importantly, being lifted and detached by wind forces.
The effectiveness of the entire roofing system relies heavily on the integrity of each individual shingle's connection to the deck. A single poorly nailed shingle can become a vulnerability, potentially leading to leaks or blow-offs that expose the underlying structure to damage.
The Standard: 6 Nails Per Shingle
For most asphalt shingles installed today, the widely recommended and often mandated standard is six nails per shingle. This applies to both 3-tab and architectural shingles, though architectural shingles, being heavier and having a different structure, particularly benefit from the enhanced fastening provided by six nails.
Why six? The primary reason is increased wind resistance. Shingles are tested to withstand certain wind speeds. Using six nails significantly improves a shingle's ability to remain attached to the roof deck when subjected to wind uplift forces compared to using fewer nails. Wind uplift is a force that tries to peel the shingles off the roof, particularly at edges and corners. The more secure fastening points a shingle has, the better it can resist this force.
The correct placement of these six nails is just as important as the number. They should be driven straight, perpendicular to the roof deck, and seated flush with the shingle surface – not under-driven (sticking up) or over-driven (breaking the shingle mat). The nails must be located within the shingle's designated nailing area, typically a strip running horizontally across the shingle, usually about 1 inch wide. For six nails, the placement is generally: one nail near each end of the shingle, and the remaining four spaced relatively evenly in between, all along the nailing strip.
The industry standard and best practice for installing asphalt shingles is to use six nails per shingle. This provides superior holding power and significantly enhances the roof's resistance to wind uplift, helping to prevent shingles from blowing off during storms.
While some older building codes or certain manufacturer instructions for specific products might permit four nails per shingle in areas not classified as high-wind zones, using six nails is almost always recommended for optimal performance and is often a requirement to achieve higher wind resistance ratings or qualify for enhanced warranties. Opting for six nails, even where four might technically be allowed, provides an extra margin of safety and durability for your roof.
High-Wind Areas and Enhanced Nailing Requirements
Areas prone to high winds, whether due to geographic location, elevation, or exposure (like coastal areas or plains), have stricter requirements for roof installation. In these zones, using six nails per shingle is not just a recommendation; it's typically a mandatory building code requirement.
Wind uplift is a powerful force. As wind flows over a roof, it creates a pressure difference, similar to how an airplane wing works. The lower pressure above the roof combined with higher pressure underneath (which can infiltrate through eaves or other openings) creates a lifting force. This force is greatest at the edges, corners, and ridges of the roof. If shingles are not adequately fastened, this uplift can cause them to detach, peel back, or even be completely blown off.
Manufacturer specifications for shingles will often list different wind resistance ratings (e.g., 60 mph, 110 mph, 130 mph). Achieving the higher ratings typically requires using the six-nail pattern and sometimes specific types of nails. Building codes in high-wind regions adopt these higher standards to protect properties.
Even if your area doesn't have official "high-wind zone" designation, local weather patterns or the specific microclimate around your home could expose your roof to significant wind forces. Choosing to install with six nails provides peace of mind and a more robust roofing system capable of handling unexpected gusts.
Factors Influencing Nailing Requirements
While the six-nail standard is prevalent, several factors can influence or modify nailing requirements. Understanding these nuances is crucial for ensuring a proper installation.
Shingle Type
- 3-Tab Shingles: These older style shingles have a single layer and are less heavy than architectural shingles. While historically four nails might have been more common, six nails are now widely recommended, especially for improved wind resistance. The nailing strip is typically clearly defined.
- Architectural (Laminate) Shingles: These are multi-layered, heavier, and designed to mimic the look of wood shakes or slate. Their construction provides inherent durability, but their weight and profile also mean they catch more wind. Six nails are almost always the standard requirement for architectural shingles to ensure they remain securely fastened and to meet manufacturer wind resistance ratings. They usually have a reinforced nailing zone.
Roof Pitch
The slope or pitch of the roof affects how quickly water sheds, but it can also influence wind dynamics. While not a primary factor in the number of nails required per shingle (that's dictated by shingle type and wind zone), extremely low-slope applications might have specific requirements, though asphalt shingles are generally not suitable for very low pitches. Conversely, very steep roofs might experience different wind forces compared to moderately sloped roofs. However, sticking to the six-nail standard within the nailing zone remains the consistent best practice across common residential pitches.
Decking Material
The material of the roof deck (typically plywood or OSB - Oriented Strand Board) affects how well the nail penetrates and holds. Nails must penetrate through the shingle, underlayment, and fully into the decking. The thickness and condition of the decking are important. Using the correct nail length is critical to ensure proper penetration – nails should penetrate at least 3/4 inch into the wood deck, or completely through thinner decking materials. A solid, properly installed deck is the necessary base for effective shingle nailing.
Nail Type and Length
Not just any nail will do. Roofing requires specific roofing nails.
- Material: Roofing nails are typically made of galvanized steel or aluminum to resist rust and corrosion. Using non-corrosive nails is essential to prevent staining or weakening of the roof over time.
- Head: They have a wide head to help hold the shingle securely without pulling through.
- Shank: While smooth shank nails are common, ring shank or deformed shank nails offer significantly better withdrawal resistance, meaning they are much harder for wind uplift to pull out of the deck. For maximum wind resistance, ring shank nails are often preferred or required in high-wind areas.
- Length: The length must be sufficient to penetrate the shingle, underlayment, and the specified depth into the deck. Common lengths are 1 inch, 1.25 inches, or 1.5 inches, depending on the shingle thickness and deck material.
Using the wrong type or length of nail can compromise the entire installation, regardless of how many nails are used.
Manufacturer Specifications
This is perhaps the most important factor. Every shingle manufacturer provides detailed installation instructions for each specific shingle product. These instructions specify the required number of nails (4 or 6), the acceptable nailing zone, the type and length of nails, and other critical details. Failing to follow these instructions precisely will likely void the shingle manufacturer's warranty. A professional roofer will always consult and adhere to the specific manufacturer's guidelines for the product being installed.
Local Building Codes
Building codes, such as those applicable in Scappoose, Oregon, dictate minimum standards for roofing installations to ensure safety and durability. These codes often specify the required wind resistance rating for roofs in the area, which in turn dictates the minimum nailing pattern (often six nails) and sometimes the type of nail. A reputable roofing contractor will be knowledgeable about and comply with all local building codes.
Common Nailing Errors and Their Consequences
Even if the correct number and type of nails are used, improper execution during installation can severely compromise the roof's performance. Common nailing errors include:
- Under-Nailing: Using fewer nails than required (e.g., 4 instead of 6, or even missing nails entirely). This is a primary cause of shingles blowing off in moderate to high winds. The reduced number of fastening points simply cannot withstand the wind uplift forces.
- Over-Nailing / Over-Driving: Driving the nail too deep, such that the nail head breaks through the shingle mat or severely compresses the shingle layers. This damages the shingle, reduces its holding power, and can create points for water entry.
- Under-Driving: Not driving the nail flush with the shingle surface. A nail head sticking up can prevent the overlying shingle from lying flat, interfering with the sealant strip and making the nail head vulnerable to being worn away by foot traffic or even pushing up through the shingle above over time.
- Wrong Placement (Nailing Outside the Nailing Zone): Nailing too high, too low, or too far to the side of the designated nailing strip. Nailing too high can miss the underlying shingle entirely or only catch the very top edge, providing almost no wind resistance. Nailing too low can interfere with the shingle's sealant strip or be visible once the next course is installed. Nailing outside the reinforced strip can also lead to the nail pulling through the shingle material easily.
- Wrong Angle: Driving the nail in crookedly instead of perpendicular to the deck. This reduces the nail's penetration depth and holding power.
- Using Incorrect Nails: Using nails that are too short (not penetrating the deck sufficiently), too thin (poor holding power), not corrosion-resistant, or without appropriately sized heads.

A roofer properly securing shingles with a nail gun, aiming for correct placement and depth.
The consequences of these errors range from minor aesthetic issues to catastrophic roof failure. Under-nailed shingles are highly susceptible to wind damage, leading to leaks and structural damage. Over-driven nails damage shingles and can cause leaks. Improperly placed or driven nails weaken the shingle's attachment and can lead to premature granule loss or cracking. Ultimately, these errors shorten the lifespan of the roof and can lead to costly repairs.
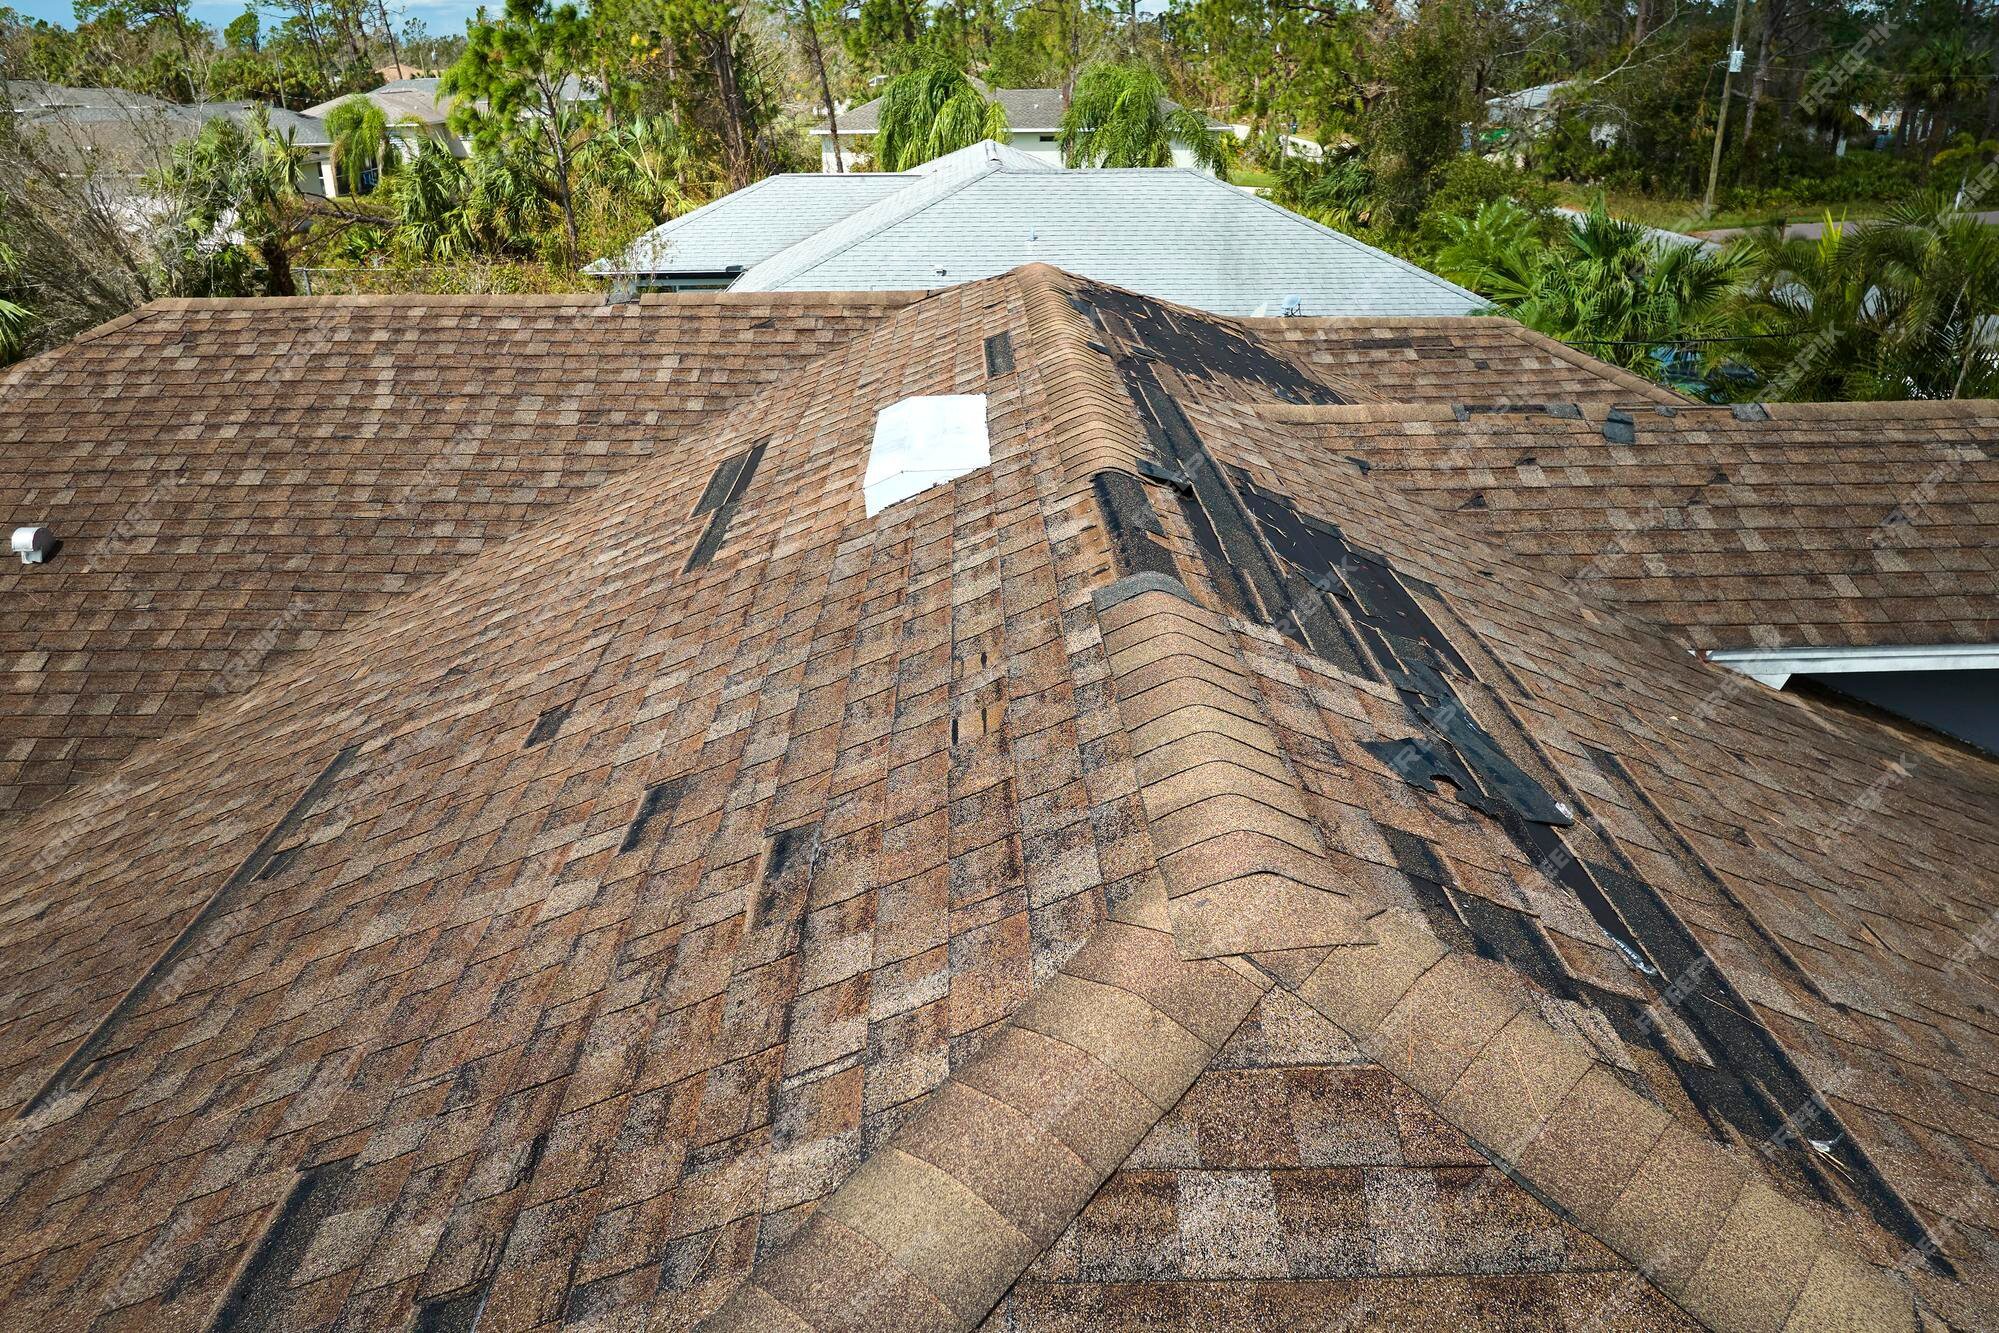
Missing shingles after a storm, a common sign of inadequate fastening or installation errors like under-nailing.
How Proper Nailing Affects Your Roof Warranty
For homeowners, understanding the link between installation practices and the manufacturer's warranty is absolutely critical. Shingle manufacturers offer warranties that cover defects in the materials themselves. However, these warranties are almost universally conditional upon the shingles being installed strictly in accordance with the manufacturer's published instructions and all applicable building codes.
This includes, prominently, the specific requirements for nailing: the number of nails per shingle, their placement, the type and length of nails, and the method of driving them (flush, not over- or under-driven).
If your roof experiences a failure that could be attributed to installation errors – such as shingles blowing off in winds below the shingle's rated speed – and it's discovered that the shingles were under-nailed, improperly nailed, or the wrong nails were used, the manufacturer has grounds to deny your warranty claim.
This is why hiring a qualified, reputable roofing contractor is so important. Professional roofers are trained in the correct installation techniques for various shingle types and are knowledgeable about manufacturer specifications and local codes. They understand that cutting corners on something like nailing can jeopardize not only the roof's performance but also the homeowner's ability to file a warranty claim if issues arise later.
Beyond Nailing: Other Critical Installation Factors
While proper nailing is fundamental, it's just one component of a complete, high-performing roofing system. A durable roof relies on several layers and components working together seamlessly:
- Roof Deck: A solid, dry, and properly fastened deck (plywood or OSB) provides the necessary base for nailing.
- Underlayment: Felt paper or synthetic underlayment installed over the deck provides a secondary barrier against water penetration.
- Ice and Water Shield: A self-adhering membrane used in vulnerable areas like eaves, valleys, and around penetrations (chimneys, skylights) to prevent water backup from ice dams or wind-driven rain.
- Flashing: Metal or other material used to seal areas where the roof meets vertical surfaces or changes plane (chimneys, walls, valleys, vents). Proper flashing is essential for preventing leaks.
- Ventilation: Adequate attic ventilation (soffit vents for intake, ridge vents or box vents for exhaust) is crucial for regulating attic temperature and moisture. This prevents premature aging of shingles from overheating in summer and reduces the risk of ice dams in winter.
- Drip Edge: Metal flashing installed along the eaves and rakes (gable ends) of the roof to direct water away from the fascia and into the gutters.
All these components must be correctly installed alongside the shingles and their proper nailing to create a weather-tight and long-lasting roof system.
When to Suspect Nailing Issues or General Roof Problems
Homeowners should periodically inspect their roofs from the ground or with binoculars to look for signs of potential problems. While you can't see the nails, the symptoms of improper nailing or other installation issues are often visible:
- Missing Shingles: This is a clear sign that the shingles failed to resist wind, often due to insufficient or improperly placed nails, or failure of the sealant strip.
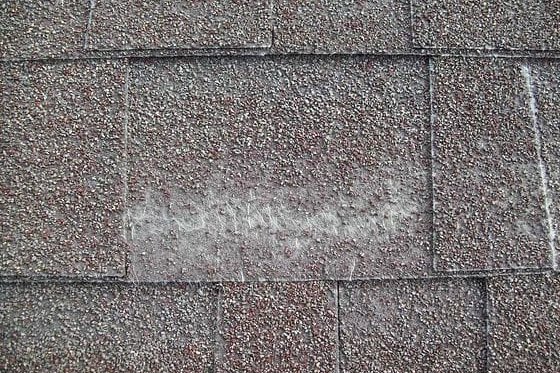
- Lifted or Loose Shingles: Shingles that are not lying flat, particularly at the edges or corners, can indicate failed sealant, but also potentially issues with how they are fastened.
- Curling or Buckling Shingles: While sometimes a sign of age or ventilation issues, buckling can also occur if shingles weren't installed flat due to underlying issues or improper fastening.
- Granule Loss: Excessive granules in gutters can indicate aging, but premature granule loss, especially on relatively new shingles, could be a sign of issues like over-driving nails that damage the shingle mat.
- Leaks: Water stains on ceilings or walls are a definitive sign of a roof problem, which could stem from improper nailing, flashing failures, or other installation defects.
If you notice any of these signs, it's time to have your roof evaluated by a professional. Ignoring these symptoms can lead to more extensive and costly damage to your home's structure.
If you're seeing signs of potential roof damage, planning a roof replacement, or simply want to understand the condition of your existing roof, getting an estimate is a good first step.
Get a quick, free estimate for your roof project or evaluation based on satellite imagery and local data: Calculate Your Roof Estimate Instantly
Dealing with an active leak or obvious storm damage? These are urgent situations that require immediate professional attention to prevent further damage.
If you need immediate professional inspection or repair for issues like leaks or storm damage, book an appointment with a qualified local roofer fast: Schedule a Roofer Appointment Today
Finding a Qualified Roofer
Ensuring your roof is installed correctly, with the proper number and placement of nails and attention to all other critical details, requires the expertise of a qualified roofing professional. A good roofer is knowledgeable about:
- Different shingle products and their specific installation requirements.
- Local building codes and wind zone requirements.
- Proper deck preparation and ventilation standards.
- Best practices for flashing and sealing penetrations.
- Safety protocols.
Choosing a reputable contractor helps ensure that your investment in a new roof is protected by quality workmanship that complies with manufacturer warranties and local regulations. They understand that details like using six nails per shingle where required are not optional, but fundamental to a roof's performance and lifespan.
SkyQuote connects you with pre-vetted roofing professionals who understand the importance of correct installation techniques, including proper nailing and adherence to manufacturer specifications. Find a trusted contractor for your project.
Connect with a Top Local Roofer: Find a Qualified Roofing Professional
Building Your Roof's Defenses Strong
Ultimately, the number of nails used to fasten your asphalt shingles might seem like a small detail, but it has a profound impact on the durability and performance of your entire roofing system. The recommendation of six nails per shingle is a standard born from testing and experience, designed to provide the necessary resistance against wind forces that can otherwise compromise your roof's integrity. Adhering to this standard, along with following all manufacturer instructions and local building codes, is essential for ensuring your roof stands up to the elements and that your long-term warranty remains valid. For homeowners, prioritizing quality installation with attention to these critical details is the best way to protect your investment and ensure your home remains safe and dry for years to come.
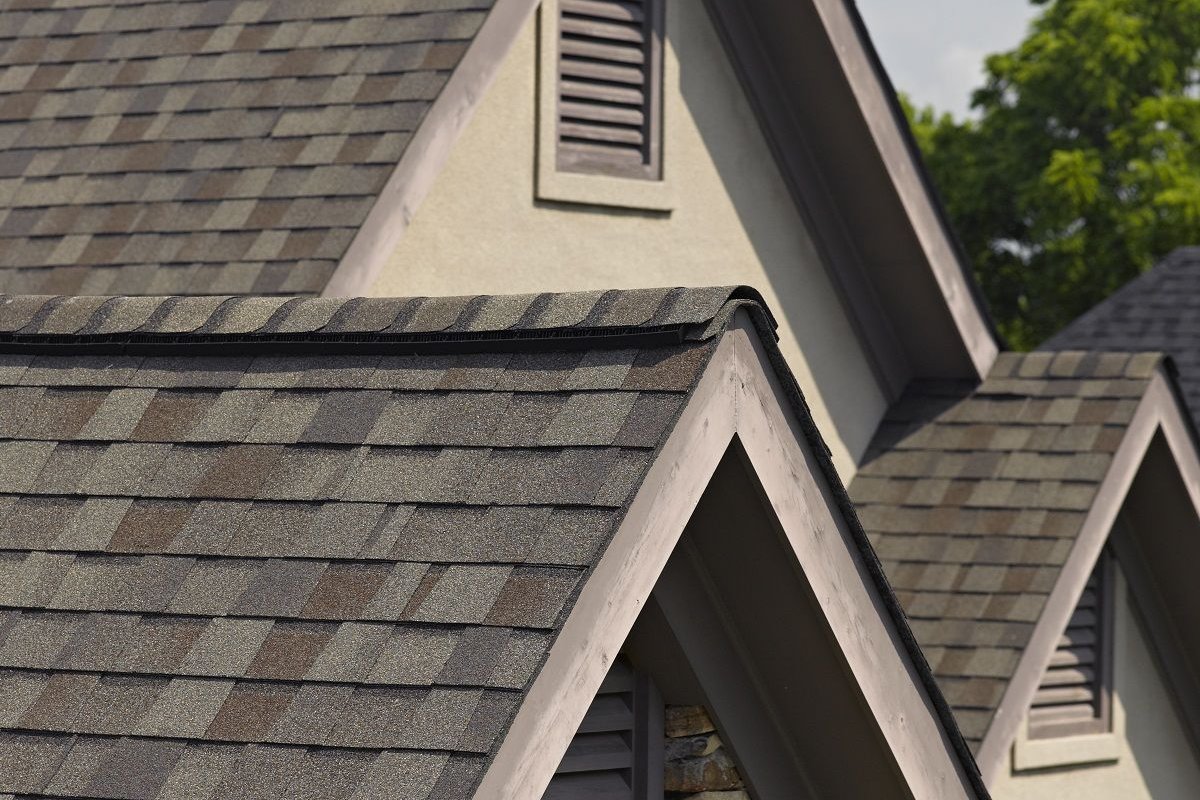
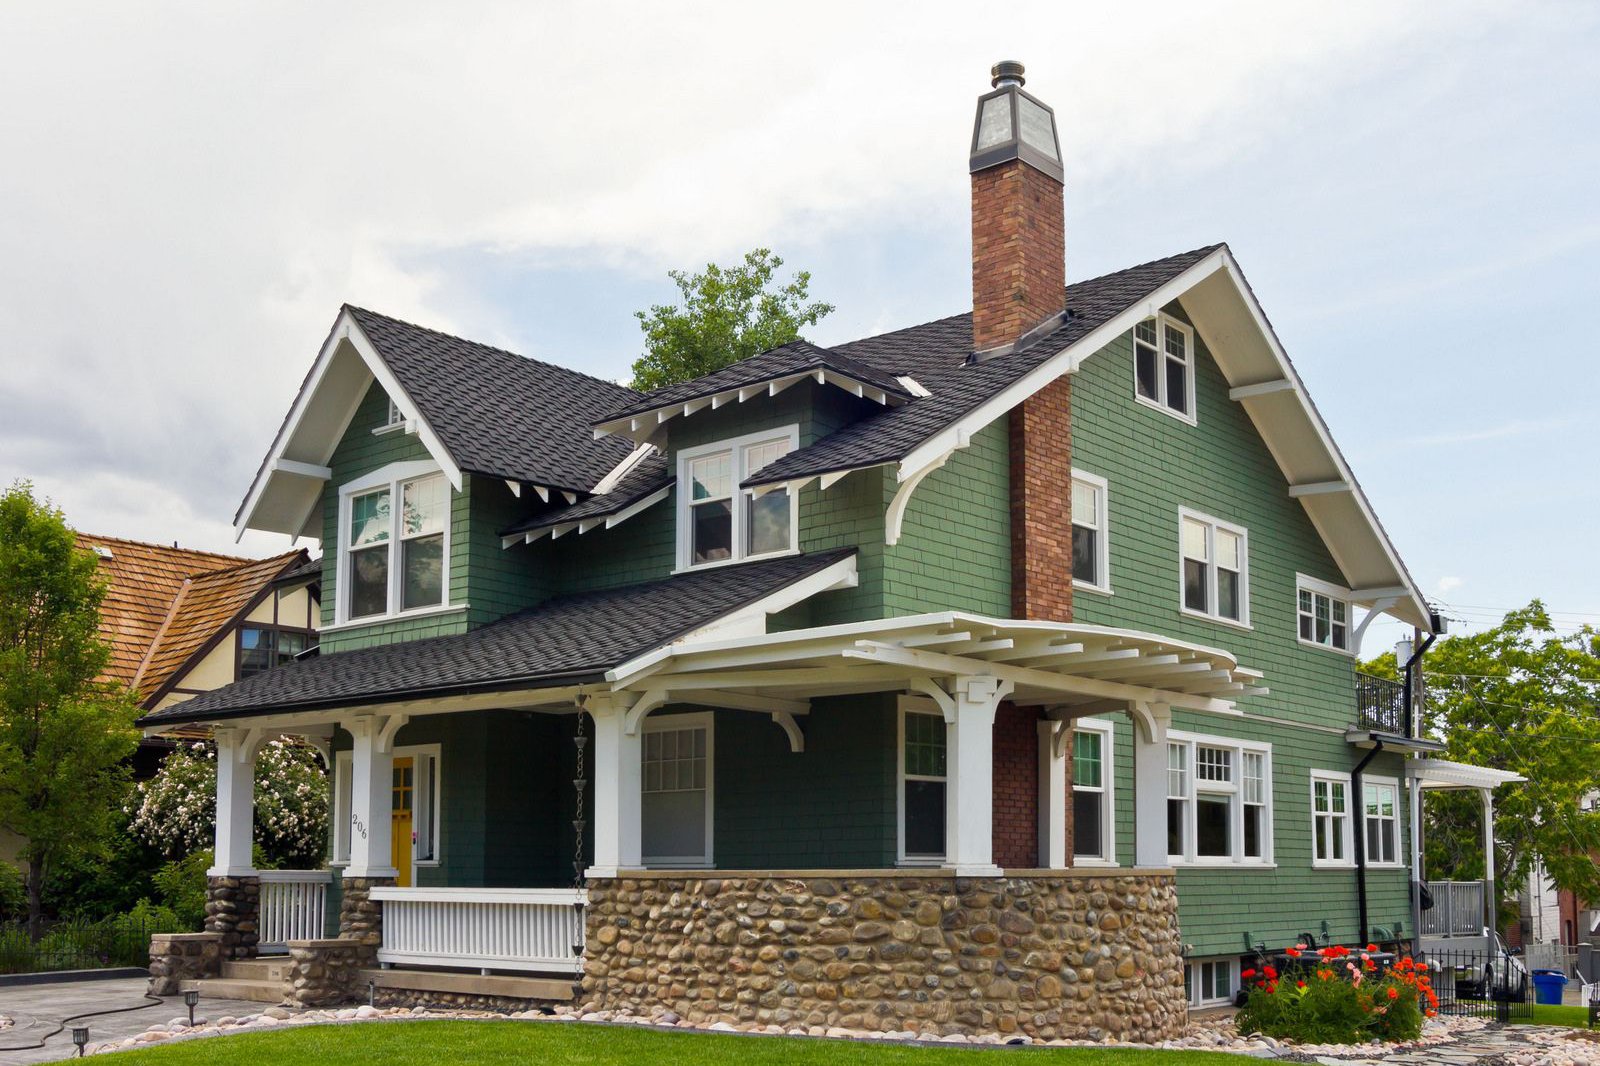
A properly installed roof using architectural shingles, where correct nailing is essential for performance and longevity.